The Best Yumblink Pancakes recipe you will fall in love with. Full of tips and tricks to help you make the best pancakes.


A kitchen sink that won’t drain is frustrating, but most causes are easy to fix at home. This guide walks you through the real reasons your sink drains slowly or stops completely, from grease buildup to clogged P-traps. You’ll learn how to fix a kitchen sink that won’t drain using affordable tools and simple techniques that really work.
There’s nothing worse than standing at your kitchen sink watching water pool around your dishes instead of going down the drain. A kitchen sink that won’t drain disrupts your entire cooking routine and makes even simple tasks like washing vegetables or rinsing plates feel like a chore. The good news? Most drainage problems have straightforward solutions you can handle yourself.
Whether your sink drains slowly or not at all, this guide covers every angle. We’ll walk you through the most common causes, the best tools to use, and step-by-step fixes that actually work. By the end, you’ll know exactly how to fix a kitchen sink that won’t drain and keep it flowing smoothly for months to come.
Before you reach for that bottle of chemical drain cleaner, pause. Many store-bought products can damage your pipes over time. The methods we share below are safer, cheaper, and often more effective. Let’s get your kitchen sink draining like it should.
Key Takeaways
- Grease and food debris are the top culprits behind a slow or clogged kitchen sink drain.
- Plunging and using a baking soda-vinegar mix solves most minor drain blockages fast.
- A plumber’s snake or drain auger handles stubborn clogs that basic methods can’t clear.
- Regular maintenance like using a kitchen drain strainer prevents future drainage problems.
- Knowing when to call a pro saves you money and avoids accidental pipe damage.
- Cleaning the P-trap is one of the most effective DIY fixes for standing water in the sink.
- Avoiding chemical drain cleaners protects your pipes and keeps your kitchen plumbing fixtures lasting longer.
📑 Table of Contents
- Why Your Kitchen Sink Won’t Drain
- Tools You Need to Fix a Slow or Clogged Drain
- How to Fix a Kitchen Sink That Won’t Drain: Step-by-Step Solutions
- Common Mistakes to Avoid When Fixing a Clogged Sink
- Prevention Tips to Keep Your Sink Draining Smoothly
- When to Call a Professional Plumber
- Final Thoughts on Fixing a Kitchen Sink Drain
Why Your Kitchen Sink Won’t Drain
Understanding what’s causing the problem is the first step to fixing it. A clogged kitchen sink rarely happens by accident. Something is blocking the flow of water, and identifying that blockage makes the solution much clearer.
Grease and Fat Buildup
This is the number one enemy of a healthy drain. When you pour cooking grease down the sink, it cools and sticks to the inside of your pipes. Over weeks and months, that layer builds up and narrows the passage. Eventually, water can barely trickle through. Even small amounts of grease combined with food particles create a thick, stubborn blockage.
Food Particles and Debris
Even with a garbage disposal, food scraps find their way into the drain. Coffee grounds, eggshells, and starchy foods like rice and pasta expand when they meet water. They clump together and create dense clogs. Without a proper kitchen drain strainer, these particles go straight into your pipes.
Soap Scum and Mineral Deposits
Hard water leaves mineral deposits inside your pipes over time. Soap scum mixes with these deposits and forms a chalky residue that clings to pipe walls. This slow buildup gradually reduces your drain’s diameter until water backs up. Homes in areas with hard water face this problem more often than others.
Foreign Objects
Sometimes the cause is simple. A small utensil, a piece of produce sticker, or a toothpick can fall into the drain and create a sudden blockage. Children’s items like bottle caps or small toys are common culprits too. These objects sit in the drain path and physically stop water from passing through.
Vent Pipe Problems
Your plumbing system relies on vent pipes to maintain proper air pressure. When a vent pipe gets blocked by leaves, bird nests, or debris, water can’t flow freely. This causes gurgling sounds and slow drainage. Vent pipe issues are less common but can be tricky to diagnose without professional help.
Tools You Need to Fix a Slow or Clogged Drain
You don’t need expensive equipment to tackle most drain problems. A few basic tools from your garage or hardware store handle the job.
- Plunger: A standard cup plunger works well for sinks. Choose one with a flat rim for a tight seal.
- Baking soda and white vinegar: This natural combo breaks down organic buildup safely.
- Plumber’s snake or drain auger: This flexible tool reaches deep into pipes to pull out or break apart clogs.
- Bucket and wrench: You’ll need these to remove and clean the P-trap underneath your sink.
- Flashlight: A good light helps you see inside the drain opening and spot visible blockages.
- Rubber gloves and old towels: Drain cleaning is messy. Protect your hands and your countertop before you start.
Having these tools ready before you begin makes the whole process faster and less frustrating. You won’t have to stop mid-fix to run to the store.
How to Fix a Kitchen Sink That Won’t Drain: Step-by-Step Solutions
Now let’s get into the actual fixes. Start with the simplest method and work your way down the list. Most clogs clear up within the first two or three steps.
Method 1: The Boiling Water Flush
This works best for grease-related clogs. Boil a full kettle of water. Carefully pour it directly into the drain in two or three stages, waiting 30 seconds between each pour. The heat melts the grease and pushes it further down the pipe. This simple trick clears minor blockages in minutes.
Quick Tip: Do not use boiling water with PVC pipes. Let the water cool for one minute before pouring to avoid damaging plastic pipes.
Method 2: Baking Soda and Vinegar
This is a favorite among homeowners for good reason. Pour about half a cup of baking soda directly into the drain. Follow it with one cup of white vinegar. The fizzing reaction breaks apart organic material and loosens buildup. Let the mixture sit for 15 to 30 minutes, then flush with hot water.
For stubborn clogs, repeat the process twice. This method is gentle enough to use regularly and keeps your drain fresh without harsh chemicals.
Method 3: The Plunger Technique
Fill the sink with just enough water to cover the plunger cup. Place the plunger over the drain and push down firmly, then pull up sharply. Repeat this motion 10 to 15 times. The pressure changes push and pull the clog loose.
Make sure you have a tight seal. If the plunger doesn’t suction properly, try smearing a bit of petroleum jelly around the rim. This small trick makes a big difference.
Method 4: Clean the P-Trap
The P-trap is the curved pipe directly under your sink. It catches debris and prevents sewer gases from entering your kitchen. When the P-trap gets full of gunk, water backs up into the sink.
Place a bucket underneath the trap. Use a wrench to loosen the slip nuts on both ends of the P-trap. Pull the trap off and dump the contents into the bucket. Use a brush or old rag to clean out the inside of the pipe and the trap itself. Rinse everything thoroughly before reattaching.
This method works wonders for clogs caused by food debris, grease, and small objects. It’s one of the most satisfying DIY plumbing fixes you can do.
Method 5: Use a Plumber’s Snake
If the clog is deeper in the pipe, a plumber’s snake or drain auger is your best bet. Feed the cable into the drain opening and crank the handle to push it through the pipe. When you feel resistance, rotate the cable to break up or hook the clog.
Slowly pull the snake out and check the end for debris. Flush the drain with hot water afterward. A drain auger is especially effective for clogs caused by hair, soap scum, and compacted food waste.
Method 6: Check the Garbage Disposal
If your kitchen has a garbage disposal, it could be the source of the problem. Turn off the disposal and unplug it. Use a flashlight to look inside the drain opening. You might find a small object stuck in the grinding chamber.
Use tongs or pliers to remove any visible debris. Never put your hands inside the disposal. Once cleared, press the reset button on the bottom of the unit and run cold water for 30 seconds. Cold water hardens any remaining grease so the disposal can grind it up properly.
Common Mistakes to Avoid When Fixing a Clogged Sink
Even with the best intentions, some approaches make drainage problems worse. Here are mistakes you should skip.
- Using chemical drain cleaners repeatedly: These products contain harsh acids that corrode your pipes. Over time, they weaken joints and cause leaks. They also only dissolve partial clogs, leaving buildup behind.
- Pouring grease down the drain: Even hot grease solidifies as it cools. Always dispose of cooking fat in a container and throw it in the trash.
- Ignoring slow drainage: A slow drain signals a developing blockage. Address it early before it becomes a complete clog.
- Using a wire hanger without care: Poking around blindly can scratch pipe surfaces or push the clog deeper into the system.
- Over-tightening connections: When reassembling the P-trap, snug the nuts firmly but don’t over-tighten. Plastic threads strip easily.
Avoiding these errors protects your plumbing system and keeps your kitchen drain healthy long-term.
Prevention Tips to Keep Your Sink Draining Smoothly
Fixing a clog feels great, but preventing the next one feels even better. A few simple habits make a huge difference.
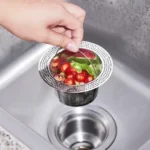
- Install a drain strainer. A simple mesh screen catches food particles before they enter the pipes. Clean it after every meal prep session.
- Run hot water after washing dishes. Flush the drain with hot water for 15 seconds after each use to melt any grease residue.
- Never put fibrous foods in the disposal. Celery, onion skins, and potato peels tangle the blades and create blockages.
- Use cold water with the garbage disposal. Cold water solidifies grease so the disposal can grind it effectively.
- Schedule monthly baking soda flushes. Pour half a cup of baking soda down the drain once a month. Follow with hot water. This keeps buildup from accumulating.
- Wipe greasy pots and pans before washing. Use a paper towel to scrape off excess grease before rinsing dishes in the sink.
These small actions take almost no time but save you from the hassle of a blocked drain. Think of them as kitchen maintenance habits, just like wiping down countertops.
When to Call a Professional Plumber
Most drain clogs respond to the DIY methods above. But some situations need a licensed professional. Here’s when to make that call.
If you’ve tried plunging, snaking, and the baking soda method without success, the blockage may be deep in your main sewer line. Signs of a main line clog include multiple drains backing up at once, gurgling sounds in other fixtures, or a persistent sewage smell. These issues require specialized equipment like a hydro-jetter or video pipe inspection that only a pro carries.
Also call a plumber if you notice water leaking around your pipes after attempting repairs. A cracked pipe or loose fitting needs immediate attention to prevent water damage. If you live in an older home with galvanized steel pipes, professional assessment is wise since these pipes corrode from the inside out.
For help with kitchen plumbing fixtures or more complex drainage issues, don’t hesitate to reach out to a trusted local plumber. A quick inspection can save hundreds of dollars in potential water damage repairs.
Final Thoughts on Fixing a Kitchen Sink Drain
A kitchen sink that won’t drain is one of those problems that feels overwhelming at first. But as you can see, most causes are simple and fixable with basic tools and a little patience. Whether it’s a quick boiling water flush, a baking soda and vinegar treatment, or a thorough P-trap cleaning, you have plenty of options that work without calling a plumber.
The key is acting quickly. The longer a clog sits, the harder it becomes to remove. Start with the gentlest method and escalate only if needed. And once your drain is flowing again, stick with the prevention tips to keep it that way.
Remember to use a quality drain strainer and avoid pouring grease down the drain. These two habits alone prevent the majority of kitchen sink drainage problems. With the right knowledge and a few household items, you can handle almost any clog that comes your way.
Now go ahead and tackle that slow drain. Your kitchen and your weekend plans will thank you.
Frequently Asked Questions
What is the fastest way to unclog a kitchen sink drain?
The fastest method is using a plunger. Fill the sink with enough water to cover the plunger cup, create a tight seal, and plunge vigorously for 15 to 20 seconds. This pressure-based approach dislodges most minor clogs within minutes. Follow up with hot water to flush any remaining debris down the pipe.
Can I use chemical drain cleaners to fix a clogged sink?
You can, but it’s not recommended. Chemical drain cleaners contain strong acids that can corrode your pipes over time, especially older or plastic plumbing. They also only dissolve partial clogs, leaving behind buildup that causes future blockages. Natural methods like baking soda and vinegar are safer and just as effective for most clogs.
Why does my kitchen sink drain slowly but not completely?
A slow drain usually means there’s a partial blockage restricting water flow. Grease buildup, food particles, and soap scum are the most common causes. Try the baking soda and vinegar method first, followed by a boiling water flush. If the slow drainage persists, use a plumber’s snake to clear the deeper buildup inside the pipes.
How often should I clean my kitchen drain to prevent clogs?
Monthly cleaning is ideal for most households. A simple routine of pouring half a cup of baking soda down the drain, followed by hot water, keeps buildup under control. If you cook with grease frequently or use your garbage disposal daily, consider cleaning the drain every two weeks to prevent debris from accumulating.
Is a plumber’s snake safe for all types of pipes?
Yes, a plumber’s snake is generally safe for all common pipe materials including PVC, copper, and galvanized steel. However, use gentle pressure and avoid forcing the cable aggressively. For PVC pipes, which are more flexible, be careful not to kink or bend the pipe with the snake. Always feed the cable slowly and let the tool do the work.
What should I do if the clog is in my garbage disposal?
First, turn off the disposal and unplug it for safety. Use a flashlight to inspect the drain opening and remove any visible debris with tongs or pliers. Never use your hands. Press the reset button on the bottom of the unit and run cold water for 30 seconds. Cold water helps solidify any remaining grease so the disposal can grind it up effectively. If the disposal still won’t work, check the circuit breaker and try the reset button again.