The Best Yumblink Pancakes recipe you will fall in love with. Full of tips and tricks to help you make the best pancakes.


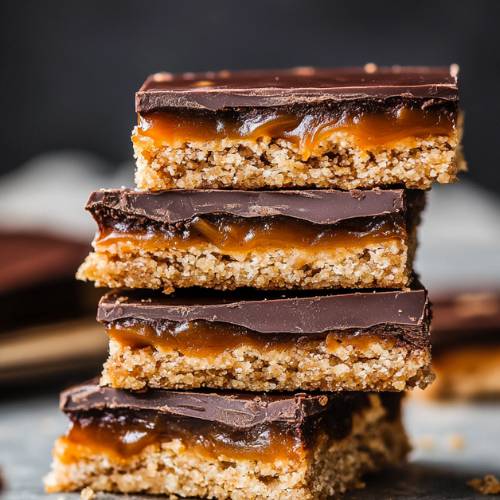
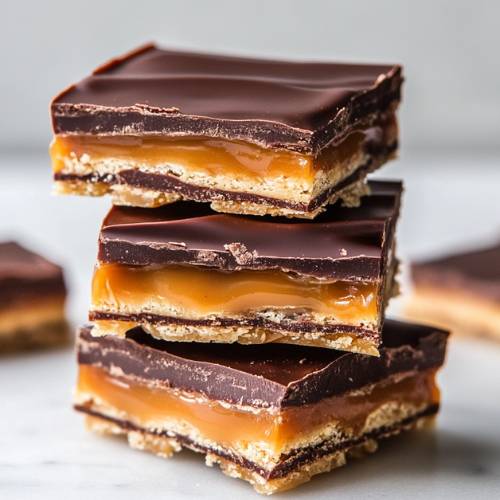
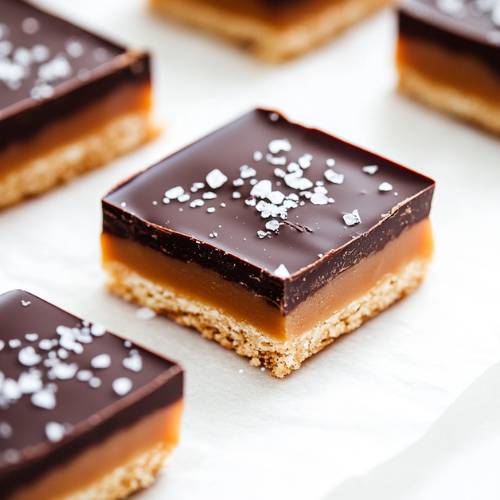
If you grew up sneaking Twix bars from the Halloween stash (guilty), you’re going to love this homemade version. These Better-for-You Twix Bars are sweet, gooey, chocolatey, and have that classic layered magic but without all the weird stuff you can’t pronounce. I made mine with simple pantry staples, and they’re gluten-free, dairy-free, and totally vegan if you want them to be. Oh, and bonus they live in the freezer, which means you’ll always have a treat ready when that craving hits!
Method
1. Make the Shortbread Layer
To start, you’ll make the base of your Twix bars the shortbread layer. In a medium mixing bowl, combine 1 cup of almond flour, 2 tablespoons of melted coconut oil, 2 tablespoons of maple syrup, and a splash of vanilla extract. Stir everything together with a spoon or spatula until it forms a soft, sticky dough. It should hold together easily but won’t be overly wet. Line a 9×6 or 9×9 baking dish with parchment paper, then press the dough firmly into the bottom of the dish. Use your hands or the back of a spoon to spread it into an even layer that covers the bottom completely. Bake the shortbread at 350°F (175°C) for 10 to 12 minutes, or until the edges are just starting to turn golden brown. Once baked, remove it from the oven and let it cool completely before moving on. This step is super important if it’s still warm, the caramel layer won’t set properly on top.
2. Make the Peanut Butter Caramel
While the shortbread is cooling, it’s time to whip up the peanut butter caramel. In a small saucepan over medium-low heat, add ½ cup of creamy peanut butter, 2 tablespoons of melted coconut oil, and ¼ cup of maple syrup. Stir continuously until the mixture becomes smooth, shiny, and fully blended. You don’t need to bring it to a boil just warm enough to combine everything nicely. Once smooth, remove it from the heat and let it sit for 5 minutes. This short cooling time helps thicken the caramel just a bit, so it’s easier to spread. Pour the cooled caramel directly over the shortbread base, which should now be fully cooled. Use a spatula to spread it evenly across the surface. Then place the entire dish in the freezer and let it chill for about 1 hour, or until the caramel layer is firm to the touch.
3. Add the Chocolate Layer
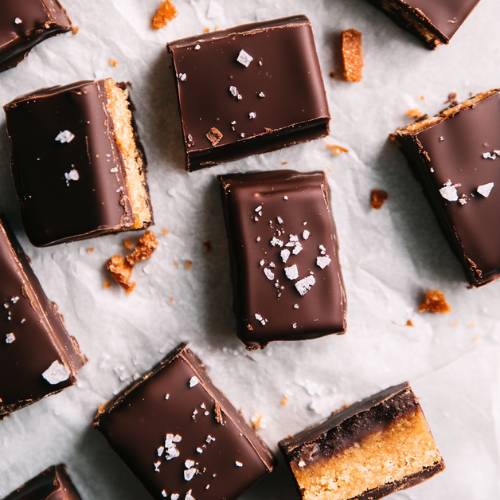
Once the caramel layer is nice and solid, it’s time to finish things off with a rich chocolate topping. In a microwave-safe bowl or small saucepan, melt together 1 cup of chocolate chips and 1 tablespoon of coconut oil. Stir frequently until the chocolate is completely melted and smooth. Then pour the chocolate over the frozen caramel layer, tilting the pan gently to spread it evenly if needed. Use a spatula to smooth out the top. Before it sets, sprinkle on a pinch of flaky sea salt. This adds a little extra magic and really brings out the sweetness of the chocolate and caramel. Place the dish back in the freezer for about 15 minutes, just until the chocolate hardens completely.
4. Slice and Enjoy
After the chocolate is firm, remove the dish from the freezer and let it sit at room temperature for 2 to 3 minutes. This quick rest makes slicing easier and prevents the chocolate from cracking too much. Use a sharp knife to carefully cut the bars into squares or rectangles whatever Twix-like shape you’re going for. These bars are best stored in the freezer, where they stay perfectly layered and ready to eat whenever that sweet tooth hits!
Necessary Tools
- Mixing bowls
- Spoon or spatula
- Small saucepan
- Parchment paper
- Baking dish (9×6 or 9×9)
- Oven
- Freezer
- Knife for slicing
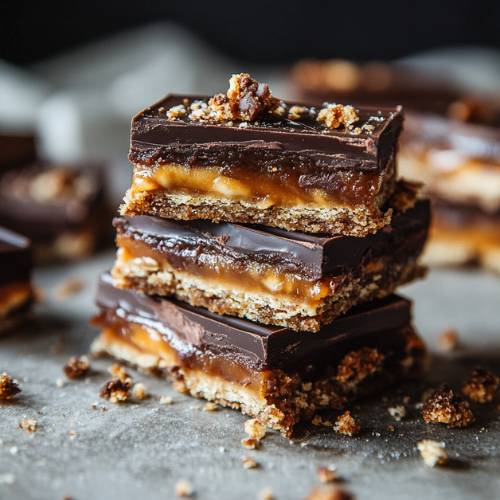
Better-For-You Twix Bars
Cuisine: AmericanDifficulty: EasyServings
1
servingsPrep time
15
minutesCooking time
12
minutesTotal time
27
minutesIngredients
Shortbread Layer
1 cup almond flour
2 tablespoons melted coconut oil
2 tablespoons maple syrup
Splash of vanilla extract
Peanut Butter Caramel Layer
½ cup creamy peanut butter
2 tablespoons melted coconut oil
¼ cup maple syrup
Chocolate Layer
1 cup chocolate chips (use dairy-free if needed)
1 tablespoon melted coconut oil
Flaky sea salt (for topping)
Directions
- Make the Shortbread Layer
In a bowl, stir together almond flour, melted coconut oil, maple syrup, and a splash of vanilla. It’ll look like cookie dough soft but sticky. Press this dough evenly into a parchment-lined baking dish and bake at 350°F for 10–12 minutes. Once it’s golden around the edges, take it out and let it cool completely. - Make the Peanut Butter Caramel
In a small saucepan over medium-low heat, stir together peanut butter, melted coconut oil, and maple syrup until smooth and glossy. Let it cool for a few minutes (this helps it thicken), then pour it over the cooled shortbread layer. Smooth it out evenly and pop the dish in the freezer for about 1 hour, or until the caramel is firm. - Add the Chocolate Layer
Melt your chocolate chips and coconut oil together until silky smooth. Pour it over the peanut butter caramel layer and spread it out evenly. Sprinkle with flaky sea salt (trust me, don’t skip it!). Freeze again for 15 minutes until the top is fully set. - Slice and Enjoy
Once the chocolate is firm, take the dish out of the freezer and let it sit at room temp for 2–3 minutes. Use a sharp knife to slice into bars. Store in the freezer for best texture!
Notes
- Don’t rush the cooling and freezing steps. Each layer needs to be fully set before adding the next or things might get messy.
- Make sure your shortbread layer is completely cool before pouring on the caramel, or it’ll melt and mix instead of stacking nicely.
- Slice gently! If your bars are too hard straight from the freezer, let them thaw just a little to avoid cracking.
Serving Suggestions
- I love grabbing one straight from the freezer when I need a sweet fix.
- Crumble a bar over vanilla yogurt or a smoothie bowl for dessert vibes.
- Serve them at Halloween parties or gift them in treat bags people go wild for them!
Fun Fact
Did you know the original Twix bar was first made in the UK in 1967 and called a “Raider” in some countries? These homemade ones may not have a golden wrapper, but they’ve got all the magic and none of the mystery ingredients.
Conclusion
If you’re craving a candy bar that’s nostalgic, delicious, and made with real ingredients, these Better-for-You Twix Bars are about to be your new go-to. They’re easy to make, freezer-friendly, and totally customizable. Trust me once you taste that crunchy shortbread, gooey caramel, and silky chocolate all in one bite, you’ll wonder why you ever bought the store-bought kind.