The Best Yumblink Pancakes recipe you will fall in love with. Full of tips and tricks to help you make the best pancakes.

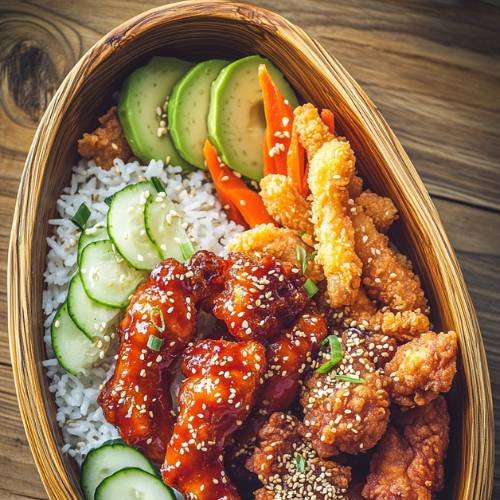
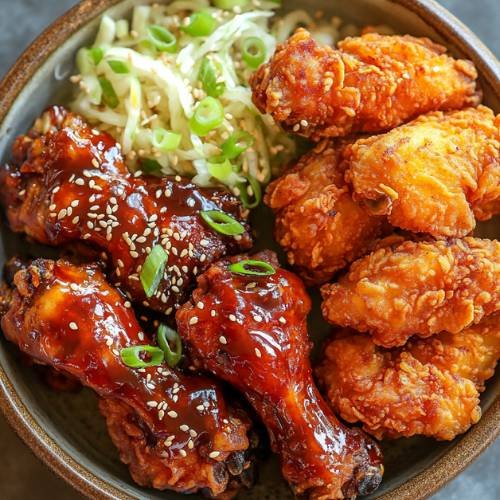
Hey there, fellow foodies! If you’ve been craving some crispy, tender fried chicken with a little extra kick, then you’re in the right place! This recipe for korean fried chicken made 2 ways: plain and yangnyeom. Trust me, both are absolute game-changers. While I was editing this, all I could think about was how badly I wanted to take a bite out of this crispy goodness again .
Method
Marinating the Chicken
Start by preparing the chicken thighs. Cut them into bite-size pieces, then place them in a large bowl. Add minced garlic, light soy sauce, white pepper, and salt to the chicken. Mix everything well, ensuring the chicken is evenly coated with the marinade. Let the chicken sit for at least 10 minutes so it can soak up all those delicious flavors. This will enhance the taste and make the chicken super tender.
Preparing the Seasoned Flour Mixture
While the chicken is marinating, grab a large bowl and combine all the ingredients for the seasoned flour. Add flour, corn starch, garlic powder, gochugaru, salt, sugar, black pepper, onion powder, and baking powder. Mix everything together with a whisk until it’s well combined. After that, take half of the seasoned flour mixture and place it into a separate container or plastic bag. This will be used to coat the chicken later.
Making the Batter
Now, go back to the large bowl with the remaining seasoned flour. Gradually add cold water, a little at a time, while mixing it into the flour mixture. Keep adding water until you get a thick batter-like consistency. This batter will help create the crispy coating on the chicken.
Coating the Chicken
Take the marinated chicken pieces and dip them into the batter, making sure each piece is well-coated. Once all the chicken is covered in the batter, take it in batches and add it to the separate container or plastic bag that has the remaining seasoned flour. Shake the container or bag gently to coat the chicken pieces with the flour. This double coating will give your chicken that extra crispy texture.
Resting the Coated Chicken
After coating the chicken, place the pieces on a wire rack. Let them rest for about 5 minutes. This resting step is important as it helps the coating stick better and sets the batter, so it doesn’t fall off while frying.
Frying the Chicken (First Fry)
Now it’s time to fry the chicken! Heat up neutral oil in a deep pot over high heat. You’ll want enough oil to fully submerge the chicken pieces. Fry the chicken in batches for 4-5 minutes or until the pieces are lightly browned. Be careful not to overcrowd the pot, as this will lower the temperature of the oil and prevent the chicken from frying evenly. After frying, place the chicken pieces back on the wire rack to drain any excess oil.
Double Frying the Chicken (Second Fry)
Once all the chicken has been fried once, it’s time for the second fry. Turn up the heat of the oil and carefully fry the chicken in batches for another 1-2 minutes. This second frying step is key to achieving that ultra-crispy texture that Korean fried chicken is known for. The second fry makes the coating even crunchier and gives the chicken a beautiful golden color.
Making the Yangnyeom Sauce
While the chicken is frying, prepare the yangnyeom sauce. In a saucepan, combine gochujang, ketchup, light soy sauce, sesame oil, honey, sugar, minced garlic, and white vinegar. Heat the mixture over medium heat, stirring constantly until all the ingredients are well combined and the sauce thickens slightly. Taste the sauce and adjust the seasoning if necessary, adding more honey for sweetness or vinegar for tang, depending on your preference.
Coating the Chicken with Sauce
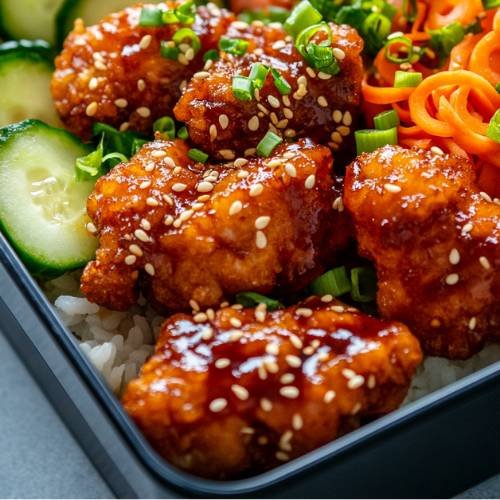
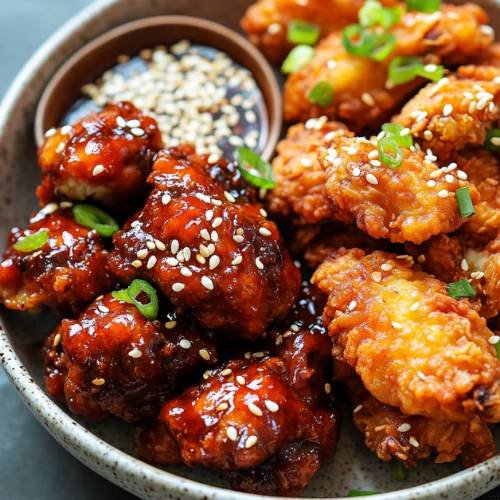
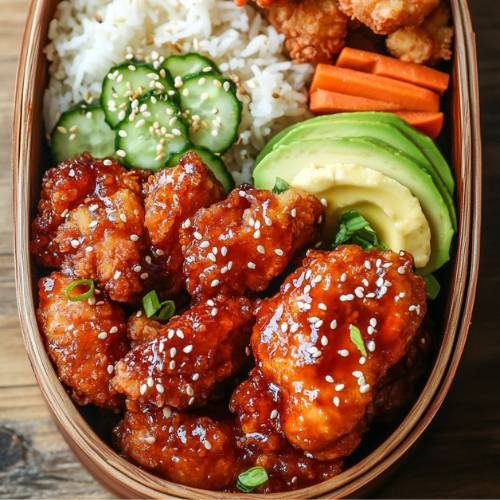
Once all the chicken pieces are fried and crispy, take half of the chicken and place it into a large bowl. Pour the prepared yangnyeom sauce over the chicken and toss gently to coat each piece evenly. After coating, sprinkle sesame seeds on top for added flavor and texture. Serve this coated chicken alongside the plain fried chicken, which can be topped with some chopped spring onions for a fresh finish.
Necessary Tools
- Large bowl
- Whisk
- Plastic bag or separate container for coating the chicken
- Wire rack
- Deep pot for frying
- Saucepan for the sauce
Korean Fried Chicken Made 2 Ways: Plain + Yangnyeom
Cuisine: KoreanDifficulty: EasyServings
5
servingsPrep time
25
minutesCooking time
15
minutesTotal time
40
minutesIngredients
350g chicken thighs, cut into bite-size pieces
2 garlic cloves, minced
½ tbsp light soy sauce
¼ tsp white pepper
¼ tsp salt
For the seasoned flour
2 cups flour
½ cup corn starch
2 tsp garlic powder
2 tsp gochugaru (Korean chili powder)
1 tsp salt
½ tsp sugar
1.5 tsp black pepper
2 tsp onion powder
1 tbsp baking powder
Other ingredients
Cold water (around ½ cup or less)
Oil for deep frying
For the sauce (Yangnyeom)
2 tbsp gochujang (Korean chili paste)
1 tbsp ketchup
½ tbsp light soy sauce
½ tsp sesame oil
1 tbsp honey
½ tbsp white sugar
3 garlic cloves, minced
1 tsp white vinegar
Directions
- In a bowl, season the chicken thighs with the marinade ingredients. Let it sit for at least 10 minutes to soak up all those delicious flavors.
- In a large bowl, combine all the ingredients for the seasoned flour. Take half of this mixture and place it into a separate container or plastic bag.
- Add cold water to the large bowl with the seasoned flour and mix it into a batter-like consistency. Toss the marinated chicken pieces into the batter.
- In the separate container with the other half of the seasoned flour, coat the chicken pieces in batches.
- Place the coated chicken on a wire rack and let it sit for about 5 minutes.
- Heat neutral oil in a pot over high heat. Fry the chicken in batches for 4-5 minutes or until lightly browned. Once done, place the chicken back on the wire rack.
- Increase the heat of the oil, and double fry the chicken for another 1-2 minutes to make it extra crispy.
- In a saucepan, combine all the ingredients for the sauce (gochujang, ketchup, soy sauce, sesame oil, honey, sugar, garlic, and vinegar) and mix over medium heat until it’s well combined. Taste and adjust the flavors if needed.
- Once all the chicken is cooked, toss half of it into the sauce and coat it evenly. Sprinkle sesame seeds on top. Serve the other half plain with some chopped spring onions on top.
Notes
- Be sure to let the chicken rest on the wire rack before frying. This helps the coating stick better.
- When frying the chicken, don’t overcrowd the pot. Fry in batches to ensure the oil stays hot and the chicken crisps up perfectly.
- Double frying is key for the crispiest chicken. Don’t skip this step, as it makes all the difference in texture.
Serving Suggestions
This Korean Fried Chicken is perfect for a cozy dinner with friends or a fun family meal. Pair it with steamed rice or serve it alongside some kimchi for an authentic Korean experience. You could also add a fresh cucumber salad or a cool coleslaw to balance the spice. And don’t forget to serve it with a nice cold drink to cool off the heat!
Fun Fact
Did you know that Korean fried chicken is famous for being super crispy? That’s because of the double frying technique that gives it that extra crunch. Plus, the yangnyeom sauce adds a perfect sweet and spicy kick!
Conclusion
Whether you love the plain crispy version or the sweet and spicy yangnyeom, this Korean Fried Chicken is guaranteed to satisfy your cravings. It’s crispy, flavorful, and perfect for any occasion. Try it out, and I promise you’ll be hooked! Happy cooking, and enjoy every crispy bite!