The Best Yumblink Pancakes recipe you will fall in love with. Full of tips and tricks to help you make the best pancakes.

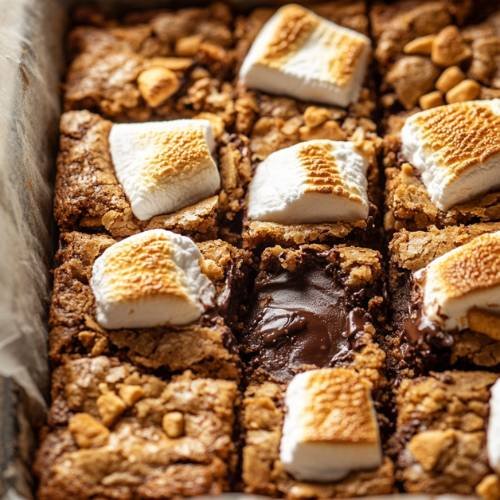
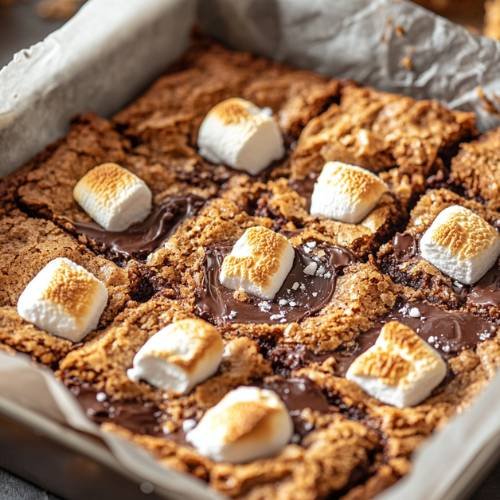
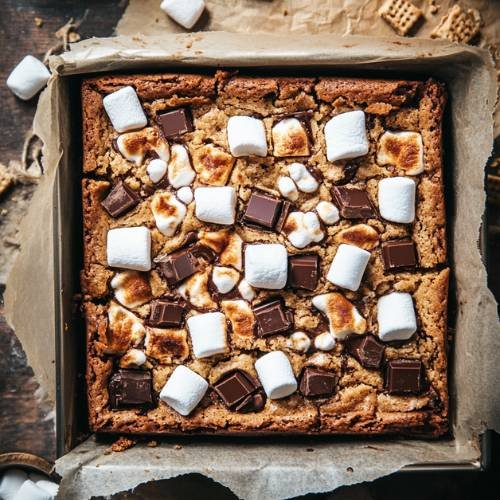
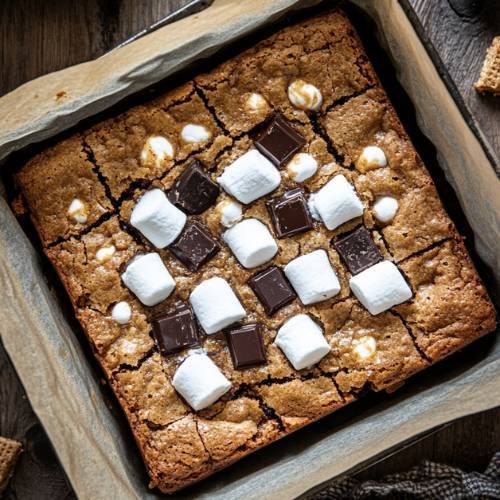
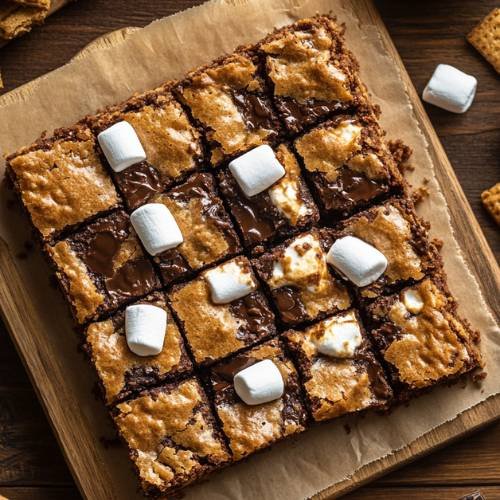
There’s just something about s’mores that screams cozy. And when you mix all that goodness into a gluten-free blondie? Magic. These Gluten-Free S’mores Blondies are gooey, chocolatey, and crispy in all the right ways. Plus, they’re made with almond flour and coconut sugar, so they’re a little better-for-you too. Whether you’re baking for a holiday party, family movie night, or just want something fun and sweet, this one’s for you.
Method
1. Preheat the Oven
Start by preheating your oven to 350°F (175°C). This gives your oven time to get nice and hot while you prepare the batter. A properly heated oven is key to getting that golden, chewy edge and soft center.
2. Mix the Wet Ingredients
In a large mixing bowl, crack in the 2 eggs, then add your melted Chosen Foods Avocado Oil Shortening (make sure it’s melted but not hot), the coconut sugar, and vanilla extract. Use a whisk or spoon to mix everything together until smooth. You want the sugar to dissolve and the mixture to look glossy and thick this is the sweet base of your blondies.
3. Combine the Dry Ingredients
In a separate mixing bowl, stir together the almond flour, baking powder, and salt. This helps evenly distribute the leavening and salt before they hit the wet batter. Mix gently until there are no lumps.
4. Make the Blondie Batter
Now it’s time to add the dry mixture into the wet mixture. Slowly pour the dry ingredients into the wet bowl, stirring as you go. Mix until the batter is thick and fully combined. Don’t overmix just stir until you no longer see dry flour. The batter should be soft and slightly sticky.
5. Fold in the Good Stuff
Here’s where the fun starts. Gently fold in the chocolate chips, mini marshmallows, and crushed graham crackers using a spatula. Be careful not to crush the marshmallows too much they’ll puff up in the oven and give that classic s’mores gooeyness.
6. Prepare the Pan
Grab your 8×8 baking pan and give it a quick spray with Chosen Foods Avocado Oil Spray. Then, line the pan with parchment paper, leaving some overhang on the sides so you can lift out the blondies later. This makes cleanup easier and helps the blondies come out without sticking.
7. Add the Batter and Toppings
Scoop the batter into the prepared pan and spread it out evenly with your spatula. Once it’s nice and level, sprinkle on some extra chocolate chips, marshmallows, and graham cracker crumbs across the top. These melt and toast in the oven for that perfect golden s’mores finish.
8. Bake
Place the pan into your preheated oven and bake for 20 minutes. You’ll know it’s ready when the edges look golden brown and the middle looks set but still a little soft. If your oven runs hot, start checking around 18 minutes to avoid burning the top.
9. Cool Before Slicing
Once baked, take the pan out of the oven and let it cool completely this part is important. If you slice too soon, the bars might fall apart because the marshmallows and chocolate are still soft. Give it time to set so you get clean, gooey-centered squares.
10. Store
After slicing, store your blondies in the refrigerator to keep them chewy and fresh. You can enjoy them cold or pop them in the microwave for 10 seconds if you like them warm and melty
Necessary Tools
Here’s what I used to make these blondies easy and mess-free
- 2 mixing bowls (one for wet, one for dry)
- Whisk or spoon
- 8×8 baking pan
- Parchment paper
- Spatula
- Measuring cups and spoons
- Chosen Foods Avocado Oil Spray
Gluten Free S’mores Blondies
Cuisine: AmericanDifficulty: EasyServings
12
servingsPrep time
10
minutesCooking time
20
minutesTotal time
30
minutesIngredients
1/4 cup Chosen Foods Avocado Oil Shortening (melted)
2 large eggs
2/3 cup coconut sugar
1 tsp vanilla extract
1 and 1/2 cups almond flour
1/2 tsp baking powder
1/4 tsp salt
1/2 cup chocolate chips
1/2 cup mini marshmallows
6 graham crackers, crushed
Extra chocolate chips, marshmallows, and graham crumbs for topping
Directions
- Preheat your oven to 350°F (175°C).
- In a large mixing bowl, whisk together the eggs, melted avocado oil shortening, coconut sugar, and vanilla extract until smooth.
- In another bowl, stir together almond flour, baking powder, and salt.
- Add the dry mix into the wet mix and stir until you have a thick batter.
- Fold in the chocolate chips, mini marshmallows, and crushed graham crackers.
- Spray your 8×8 pan with avocado oil and line it with parchment paper. This helps the bars pop out easily later.
- Pour in the batter and smooth it out. Sprinkle a few more chocolate chips, marshmallows, and graham cracker crumbs on top for extra yum.
- Bake for 20 minutes or until the edges are golden and the center looks set.
- Let it cool completely before slicing trust me on this. Cutting too soon = sticky mess.
- Store leftovers in the fridge so they stay fresh and chewy.
Notes
- Don’t overmix the batter it can make the blondies too dense.
- Make sure the shortening is melted but not hot, or it’ll cook the eggs.
- Let the bars cool before slicing so they hold their shape.
- Keep an eye on the oven after 18 minutes every oven is a little different, and we don’t want burnt marshmallows.
Serving Suggestions
- Serve warm with a scoop of vanilla ice cream for a melty treat.
- Cut into small squares and wrap them up for a cute holiday gift.
- Bring them to your next potluck they’ll disappear fast.
- Pair with a cup of hot cocoa or tea for the ultimate cozy moment.
Fun Fact
The word blondie is like a brownie’s golden cousin it skips the cocoa but keeps all that rich, chewy goodness. And guess what? S’mores actually became popular in the 1920s, thanks to Girl Scouts. That’s almost 100 years of marshmallow history right there!
Conclusion
These gluten-free s’mores blondies are soft, sweet, and just the right amount of messy. They’re the kind of dessert that brings people together just like real campfire s’mores. But way easier (and no smoky clothes required). If you’re looking for a feel-good recipe that tastes like childhood and holidays all at once, this is it. Hope you enjoy every gooey bite!